Tuesday, October 31, 2006

Chipotle Cheddar Mashed Potatoes

This recipe is so warm and delicious. Everyone will want seconds! Serve it with our Oven Fried Chicken recipe, and you'll have a wonderful meal.


Chipotle Cheddar Mashed Potatoes

Ingredients:
About 10-15 white skinned or yellow skinned potatoes
1 package extra sharp cheddar cheese
1 teaspoon ground chipotle
2 cloves pressed garlic
Milk
2 tablespoons green onion
Salt

Directions:
Chop the potatoes into uniform pieces, and boil till soft. No need to peel them. While they cook, grate the cheese. Drain the potatoes, and put back in the pot. Mash them with a masher or whisk, adding milk until the potatoes are the consistency you like. Add the grated cheese, chipotle, crushed garlic, green onion, and salt. Stir. Taste. Adjust.


Put potatoes in a casserole, and top with additional grated cheese. Bake or broil at 350˚ until the top looks delicious.


Posted by Picasa

Toasted Pumpkin Seeds

Happy Pumpkin Day! Looking for a great way to make use of your pumpkin seeds? Elise at Simply Recipes tells us how to toast your seeds! Not only is this festive, but your kids will love this healthy snack.


 Posted by Picasa

Monday, October 30, 2006

Comfort Food Recipe: Oven Fried Chicken

There's something about fall that sends me into nesting mode! Not only do I feel a sudden need to organize every drawer in my house, but I also crave comfort food.

Last weekend my dad and I decided to cook up a wonderful, warm meal of Oven Fried Chicken and Chipotle Cheddar Mashed Potatoes. Below you will find our favorite Oven Fried Chicken recipe. Not only is this delicious... it is also a healthy alternative to our southern staple, fried chicken.

Perfect Oven Fried Chicken

Ingredients:
Chicken breasts (We used boneless, skinless, but we both agree it would have been even better
with bone-in)
2 cups Pepperidge Farm stuffing
1/4 cup Parmesan cheese
1/2 cup finely chopped almonds
1 clove garlic, chopped
salt & pepper to taste
3 tablespoons parsley
1/4 teaspoon thyme, dried
1/4 cup extra virgin olive oil


Directions:
In a medium bowl, combine stuffing, cheese, almonds, garlic, parsley, thyme, and salt & pepper. Pour olive oil in a shallow bowl. Dip the chicken in the oil then cover in the crumb mixture. Bake at 400 degrees for 25 minutes.


Stay tuned tomorrow for our Chipotle Cheddar Mashed Potatoes. Oh, and don't forget to enter our contest for your chance o win one of ten FREE Secret Ingredients heirloom cookbooksPosted by Picasa

Friday, October 27, 2006

A Special Sneak Preview: Secret Ingredients Keepsake Cookbooks!

Next Friday, November 3, Secret Ingredients will launch a new product line of custom cookbooks- just in time for the Holidays!

Our new Keepsake Cookbooks are the perfect book for any situation- from holiday recipe collections, gifts and wedding favors to family reunion cookbooks. Not only are these books very affordable (starting at $29.95 for only one cookbook!)... they are also adorable.


You will be able to choose from 4 different cover designs and customize the cover. Each book is the size of a postcard (4" x 6")- perfect for favors and gifts.


Each Keepsake Cookbook will include the following features:

  • With a minimum of only 25 recipes, these books can also accommodate hundreds!

  • Customize the cookbook cover with your title and subtitle
  • A full-color photograph

  • A personalized Dedication Page

  • Table of Contents

We know you’ll love these books! Please email me if you have any questions, and be sure to check them out on our website next Friday (Nov.3)!

 Posted by Picasa

Thursday, October 26, 2006

Create a Family Cookbook for the Perfect Holiday Gift!


Give an unforgettable gift to your loved ones for Christmas this year: A Secret Ingredients Family Cookbook!

Do you still have time?

Sure! Your Heirloom Cookbook Project will need to be complete by December 4 to ensure delivery in time for the Holidays. To guarantee that you receive your favorite customized choices (Binder and Dividers), go ahead and place your order by clicking the "Checkout" button.

Your cookbook project does not have to be complete to checkout. You may finish your project at your convenience. Simply click the "Cookbook Complete" button when you're finished, and the Secret Ingredients elves will make your cookbooks and deliver them to you within 14 business days!

Looking for the perfect gift for friends and neighbors? Our new Keepsake Cookbooks will be released on November 3. You may submit as few as 25 recipes or as many as you would like. They are perfect for Holiday gift giving. Stay tuned to our blog for a sneak peak... coming very soon!

Wednesday, October 25, 2006

How to Enter Recipes with Multiple Sections

Recipe Sections are one of the great features included in each Secret Ingredients cookbook project. Because the Secret Ingredients team alphabetizes your recipes for you, we wanted you to be able to link recipes within a recipe. This way recipes that are related to one another won't be separated when they are alphabetized!

Do you have a cake recipe that contains two parts- one for the cake and one for the icing?

This is the perfect example of when you would use our Recipe Section feature. Here's another example: My mother always serves Bordelaise Sauce, Horseradish, and Yorkshire Pudding with her favorite roast beef recipe. So, when we made our family cookbook we used Recipe Sections to link the three sides with her original roast beef recipe.

How do you use Secret Ingredients' Recipe Sections?

  • Enter the first section in your "Add Recipe" form. For example, if you have a cake/icing recipe, enter the cake recipe first.
  • Instead of clicking "Recipe Complete" after you type your recipe, click "Next Section."
  • Enter the second recipe section. This is when you would enter the fabulous icing recipe for your cake.

  • Continue until you have added all recipe sections. Then click "Recipe Complete."

To review your Recipe Sections, click on "Recipes." Find your recipe by clicking on its category. You will notice that the recipe sections are listed underneath the first recipe title. Each section can be edited separately. How handy is that!

You do not have to use Recipe Sections if you don't want to. Enter your recipes exactly as you would like them printed.

Don't forget about our Heirloom Cookbook contest! Click here to enter for your chance to win a FREE custom cookbook.

Tuesday, October 24, 2006

Family Recipes from the Domestik Goddess

Our blogger friend Jen, the Domestik Goddess, keeps us up-to-date on the latest and greatest news for our homes each day. Jen also has an incredible collection of family recipes that she posts regularly on her blog.

Jen does an incredible job of giving her readers the story behind her recipes. For example, here is an excerpt from her War Cake recipe:

"Our family often serves this War Cake on Remembrance Day — Veterans Day to our cousins in the USA — as a reminder of what life was like on the home front in the Second World War. But this heavy dark cake is a tasty family favourite. In fact, my sister liked it so well that as a child she always demanded it for her birthday cake!

War cake recipes vary, but they are traditionally butter-less, egg-less, milk-less, and sometimes sugarless, reflecting those difficult days when many "luxury foods" were in short supply and prohibitively expensive, or even under wartime rationing controls.

This particular old recipe comes from the well-worn pages of Grandmother's own handwritten cookbook. It does call for a bit of butter but substitutes brown sugar for the refined white sugar which was hard to come by in Atlantic Canada. It is well-suited to a topping of boiled frosting or whipped cream, but of course Grammie used to serve it plain."

Click here to read the recipe.

Not only does her recipe note tell us about her family history and memories, but it also fills us in on world history at the time in which the recipe was created and gives preparation tips. Now that's a recipe! To read more of Jen's recipes, check out her recent Recipe Round-Up.

The great thing about writing detailed recipes in your family cookbook is that it will make your children and future generations aware of their family history and the events that shaped past generations. Unlike most heirlooms, family cookbooks are used on a regular basis- not stored away in closets and unused drawers. How fun will it be to share your family history with your children as you make Holiday cookies or a special dessert?!

Do you have a family recipe that has a neat story? Share it with us, and you may win one of ten free heirloom cookbooks! Check out our current contest for more details.

Friday, October 20, 2006

The Perfect Fall Soup


Fall has settled into the mountains of Asheville, North Carolina, Secret Ingredients' home base. The changing leaves are beautiful, the temperature is cooling, and I am craving a warm, fall soup to celebrate the new season.

I searched my mother's recipe collection for the perfect recipe, and I found it!

With colorful veggies, fresh herbs, and warmth, this recipe celebrates the best of the season. My mother's note on this recipe reads, "This will warm your body and your heart!"

Harvest Soup

Ingredients:
3 tablespoons olive oil
1 1/4 cups chopped onion
1 teaspoon minced garlic
7 cups vegetable stock
3/4 cup turnips, cubed
1 cup diced sweet potato, peeled
1 cup peeled carrot
salt & pepper
1 cup celery, diced
2 cups chicken breast halves, skinned, boned, and cut up
3 tablespoons fresh tarragon


Directions:

Heat oil on low heat. Add onion and cook until soft. Remove cover; heat to medium and add garlic. Stir in broth, turnips, sweet potatoes, carrot; boil.

Reduce heat to low. Simmer until crisp tender- about 20 minutes. Season. Add celery and chicken. Simmer until chicken is opaque- about 10 minutes. Add herbs last.


Posted by Picasa

Thursday, October 19, 2006

How to Restore Old Family Photos

Secret Ingredients heirloom cookbooks are the perfect way to share and document old family photographs. Many of our members have restored old family photographs just so they can use them in their cookbook project.

How do you restore old photographs?

If your photographs are faded, scratched, or torn, it is possible to have them fully restored. You will be surprised- sometimes the restored image is even better than the original. Look at this photograph of my grandparents at a high school dance...


My family had this photograph restored by a professional. The original photo had worn edges and significant fading.

Here are some tips to help you restore your old photographs:

  • Photocopying does not work. Although it will somewhat flatten any rips or tears, photocopying does not fix color, fading, or scratches.

    This is an example of a photocopy of an old family photograph. Notice that the image is not sharp and the gray lines at the top of the image were not as dark on the original image.


  • Computer software. There are many computer programs that will help you remove scratches, tears, and other imperfections. This software can be expensive and complicated, so if you have savvy friends or family members, ask for their help!


  • I scanned and enhanced this photo of my grandparents in Adobe Photoshop. I adjusted the color and contrast, patched tears, cropped the image to remove the worn edges, and then applied a sharpen filter.


  • Photo Kiosks. If your photo only needs to have the color restored, you can do this from a photo kiosk at your local drugstore, photo shop, or large retailer. At a photo kiosk you can scan your image, adjust the image, and order prints. To read about Kodak's photo kiosk's and how to use their features, click here.


  • Ask a professional. If your photograph has a lot of damage, it would be worth the expense to have it restored professionally. Call or visit your local photo shops. A professional restoration could cost up to $30, but your family will be very appreciative.


  • Check out our Purely Organic sample to see how wonderful old family photographs look in a Secret Ingredients cookbook!

 Posted by Picasa

Tuesday, October 17, 2006

Tips for Taking Great Family Photos

Your Secret Ingredients cookbook has two major elements: your recipes and family photographs. It is this combination of family memories, stories, recipes, and photographs that make your cookbook project so special. Because photographs play a major role in creating your custom cookbook, I want to give you some tips for taking great photographs!

The photographs we frame and share are the ones that evoke emotion and capture our most favorite memories or the personality of our loved ones. The following tips will help you make your photographs even better!


  • The Rule of Thirds. Did you know that placing your subject in the middle of the picture is generally not the best option? The Rule of Thirds is one of the best photo tips out there! Simply divide up your image into thirds vertically and horizontally by imagining a tick-tack-toe grid in your viewfinder. Where the lines intersect are the most powerful points for placing your subjects. Click here to see an example from Kodak’s website.


  • Make sure that you are on the subject’s level. If you are taking pictures of kids or pets, actually kneel down to take better pictures.


  • Avoid distracting backgrounds. A plain background always compliments your subject.


  • Know when to use your flash. Turn your flash on to take pictures of friends and family outdoors on a sunny day. If you are taking pictures of people who are more than five feet away from you, make sure your flash is on. If your subject is within five feet of you, use your fill flash. If you are taking photos of Holiday lights at night, be sure to keep that flash turned off!


  • Double-check your lighting. Make sure that the lighting is complimentary of your subject. Shadows and bright sunlight can produce shadows or highlight your subject too much.


Be sure to check out Kodak’s Top Ten Tips for Great Pictures for more tips. Also, check back with us tomorrow to learn more about enhancing and editing your old family photographs! Posted by Picasa

Monday, October 16, 2006

Butter Cookies for Cookie Month

Did you know that October is National Cookie Month? I've googled, queried wikipedia, and even asked Jeeves and I can't figure out why October is National Cookie Month. Does anyone know?

I'm glad to join in the celebration of one of my favorite things- cookies! Everyone loves cookies, and I wanted to share one of Secret Ingredients' favorite cookie recipes with you. This recipe came from one of the first cookbooks I made, and its author, Susan Lapis, was happy to share it with us!

I made these cookies this weekend and handed them out to my neighbors. One neighbor knocked on my door yesterday to see if I had any left. These babies are good! With a little creativity and patience, you can turn this recipe into a masterpiece.

Butter Cookies

Ingredients:
1 cup butter (2 sticks, softened in microwave)
1/3 cup sugar
1 egg
2 1/2 cups unbleached white flour
1 teaspoon real vanilla extract
1/2 teaspoon salt (unless you used salted butter)
Icing:
1 tablespoon cream
1 tablespoon butter
1 teaspoon vanilla
powdered sugar
food coloring (optional)

Directions:
Cream butter, sugar, and egg. Add flour, vanilla extract, and salt (if needed) and combine. Chill the dough for 10-15 minutes. This makes it easier to work with, although you may skip this step if needed. Make sure not to chill dough too long or it will harden beyond being pliable.

Roll dough on a floured board using a floured rolling pin. Cut out the cookies using your favorite shape, and bake them on a greased cookie sheet for 8-10 minutes at 350 degrees. They are done when the edges barely begin to brown.


When cookies have cooled, combine ingredients for icing. Add powder sugar slowly until you reach your desired thickness. For ideas on decorating your cookies, check out this article on Martha Stewart Living.

The cookies I made below are, well, a little sloppy! I was cooking several dishes at once, and my cookies didn't get the attention they needed. BUT they were absolutely delicious!


To learn about the history of cookies check out this article on whatscookingamerica.net. Did you know that Girl Scouts have been selling cookies for almost 90 years?!

To add this recipe to your Secret Ingredients cookbook project, simply look under "Cookies" in the Stock Pot. Then, find Butter Cookies and click the "Add this recipe" button.

Reminder: The Secret Ingredients contest is still underway. Enter now for your chance to win one of ten free custom cookbooks!
 Posted by Picasa

Friday, October 13, 2006

Celebrate World Egg Day with an Incredible Soufflé

I really love any good soufflé recipe, and since today is World Egg Day, I thought I would pass on my most favorite soufflé recipe. From my great-grandmother's kitchen comes this jewel of a recipe, Cheese Soufflé.


Cheese Soufflé

Serve immediately!

Prep Time: 30 min. • Cook Time: 30+ min.
Yields: 4-5 servings • Oven Temp: 350°

Ingredients:
4 tablespoons butter
4 tablespoons flour
1 cup grated cheese (sharp cheddar)
1 cup milk
4 egg yolks
4 egg whites
salt

Directions:
Preheat oven to 350°. Place butter and flour in a heavy sauce pan over medium heat. Smooth into paste. Add salt and milk- a little at a time as to not have lumps. Add cheese and stir until melted.

In a separate bowl, beat egg yolks with a whisk until lemon yellow and a little thick. Add yolks to cheese mixture.

It will look like this...


Finally, with electric mixer, beat whites until very stiff- takes almost 7-10 minutes.


With large spoon, pour cheese mixture a little at a time into whites and gently mix in.

Affix a wax paper collar to greased soufflé dish, pour in batter and place in 350° oven to bake for 30 or so minutes. Do not remove until thoroughly done.


This recipe is so delicious! Your guests will beg you for the recipe. I fixed this recipe for my group of girlfriends last night and received rave reviews.

If you would like to add this recipe to your cookbook project, you may do so very simply by checking out our Stock Pot. For directions on adding Stock Pot recipes to your Secret Ingredients cookbook, click here.

To learn more about creating your own family cookbook, check out Secret Ingredients. Posted by Picasa

Thursday, October 12, 2006

Bring Back Family Meals

Last night I had another great meal with my mother! Although Mom and I have very busy schedules (she is in graduate school getting her second master’s degree at 57!), we meet every Wednesday night for a sit-down, home cooked meal and a movie.

I grew up in a very traditional family. Every night I enjoyed a delicious family meal with my parents and sister, and on Sundays we would join the extended family for brunch or dinner at my grandparents’ house.

My grandfather Bud loved to make his grandchildren laugh during our family meals!


The comfort and warmth of a meal with family makes us feel grounded and connected. It is the perfect time to catch up and to enjoy each other’s company in the midst of busy days. The American Psychological Association published a study in 1997 that proves that family meals take a major role in the lives of teenagers and young children. The association’s studies found that well- adjusted teenagers (teens with healthier friendships who are more motivated academically and avoid common peer pressures) ate dinner with their families at least five times a week. The University of Minnesota and the University of North Carolina found similar results in their study on family meals.

Even if your family is spread out all over the country, getting together with your social family is equally important. I do both! On Wednesday nights I eat dinner with my mother and on Friday nights I get together with my closest friends. These meals break up my busy work schedule and are very refreshing.


HOW TO BRING "FAMILY" MEALS BACK INTO YOUR LIFE:

  • Begin slowly. The trick is to not get overwhelmed with preparations or burned out on the concept. Start adding one sit-down meal to your schedule each week. Gradually increase your family meals at a comfortable rate.


  • Choose easy meals. The quality of the food at your family meal should not be the initial focus; although, later you will find that offering picky children healthy food will become easier as your sit down meals become more familiar. In the beginning, keep it simple. Even make-your-own-pizza night would be fun for your entire group and low stress for you! For “social families”, stick to potlucks. Let everyone bring their favorite.


  • Get everyone involved. Children love to be included in projects and to feel “helpful”. This is especially true in a low stress, happy environment. Ask your children to help pour beverages or to set the table. You may also get them involved with meal planning. This will give you the opportunity to guide them towards healthier options.


  • Keep family meals enjoyable. Give each person time to talk about their day, and avoid negative conversation. This is also a great time to discuss upcoming events and holidays.


  • Turn off the TV and cell phones. Taking time out of your day to enjoy your loved ones without interruption is refreshing and can make you feel more efficient when you return phone calls and return your focus to work.


  • Be creative. Family meals can take place at any meal time and anywhere! If your schedule is too busy at night with sporting events and board meetings, pack a picnic dinner to share between events, meet for lunch instead, or plan to have breakfast together.

  • One wonderful way to celebrate your family meals is to create a family cookbook! Create a family cookbook to give your older children as reminders of your time together. Create a cookbook full of dinner party recipes for your social group. Start your cookbook project today with a free trial!
 Posted by Picasa

Wednesday, October 11, 2006

Choosing Photographs for Your Family Cookbook

Do you have drawers and computer folders filled with family photographs? Choosing photographs for your Secret Ingredients cookbook project can be a lot of fun. Not only will you walk down memory lane as you choose the perfect photographs for your recipe scrapbook, but you will also see your cookbook project come to life as you tell your family's story through recipes and photographs.

Today I wanted to offer some tips to help you choose the perfect photos for your custom cookbook:

  • Include both old and new photos. This year I am creating a special Secret Ingredients cookbook for my sister, Whitney. I decided to alternate old black & white photographs of our grandparents and parents with more recent color photographs of Whitney's wedding and her two beautiful babies. This combination highlights some of our most favorite memories together and celebrates the people we love so dearly.


  • Be creative with color. If you are familiar with photo editing software or know someone who is, you can enhance your photographs by changing the color levels and cropping. Play with your photographs to find your favorite color settings. Use filters to sharpen the image or remove noise (scratches, specks, etc.) on your older photographs.

    If you do not have photo editing software, consider downloading Google's Picassa. This is a free program that will organize your photographs and make your life a lot easier! Picassa includes basic photo editing features that are easy enough for anyone to use. Picassa's features include the following: color adjustment, a cropping tool, and a red eye tool.


  • Groups: Make sure to include everyone. Ask your friends and family to send you their favorite photographs via email or snail mail. If you are doing a family reunion cookbook or a group cookbook, devote one divider to each branch of your family or social group. This works out perfectly!


  • Consider your divider set. Before deciding where your photographs will be placed in your Secret Ingredients cookbook, you may find it very helpful to look at our divider samples. Simply click on the name of the divider set that you have chosen to flip through an entire sample set. Your cookbook will look even better if your photographs match the backgrounds on each divider.


  • Think about creative placement. Consider matching your photographs with the divider category. For example, the Secret Ingredients recently finished a very cute heirloom cookbook for a young family. On the Pasta divider, the family included a photograph of their young daughter eating spaghetti- red tomato sauce covering her hands and mouth. It was so cute! The same family added a photograph of their two daughters in standing on the front stoop of their house dressed in their Halloween costumes.


  • Photographs of food, family meals and get-togethers, holidays, and celebrations are perfect for family cookbooks! In the sample photograph above, two sisters share tea time with their cousin. These are moments worth celebrating and documenting!

    If you have any difficulty uploading your photographs to your cookbook project, don't worry. We will be glad to offer you easier solutions. Just give us a call or send us a quick email!

 Posted by Picasa

Tuesday, October 10, 2006

Create a Family Newsletter

Yesterday I mentioned that family newsletters are a great way to keep your family up-to-date on your Secret Ingredients cookbook project. Have you ever considered making a family newsletter? It's a wonderful way to stay in touch with your family around the world...

How do you organize a family newsletter?


  • Create a Mailing List. Although it is perfectly fine to make a handwritten address list for your family newsletter, we recommend using spreadsheet software so that you can do a simple mail merge later.

    Need to find addresses? Send an email to your family members and ask them to send you their addresses along with their children's contact information. Be sure to call your family members who are not electronically connected!

  • Choose a Format. Although email newsletters are very convenient, they may be difficult to pull off. Unless you are very computer-savvy, creating a newsletter with beautiful graphics and photographs is pretty difficult. Also, email can be difficult for older generations. If you would like to send an email newsletter, you can always create a plain text email and send photographs as attachments.

    We recommend sending your family newsletter the old-fashioned way- snail mail. Not only will it be a great keepsake, but your family members will be more appreciative and excited to receive it!

    You can easily design your family newsletter in a word processing program. Microsoft Word users- Click here to download family newsletter templates. How cool is that!
    If you are creating a handmade newsletter, simply take it to your local copy shop or office supply store to make color copies.

  • Find Out about Upcoming Events. Before you create your newsletter, it's a good idea to contact your family members for an update. Ask them if there are any important dates, recent achievements, memories, stories, or recipes that they would like to contribute. Don't forget to ask your children to get involved. Perhaps they could draw a picture, write a funny poem, or share a story!

  • Include Family History. Mix up old stories with the new! Include photographs of older family members when they were younger. Your children will get a kick out of seeing their aunts and uncles in their high school fashions! Also, include funny stories about grandparents and the favorite family recipes.

What a great way to stay connected! It is also the perfect way to let your family know about your Secret Ingredients cookbook project.

Did you know that Secret Ingredients is having a contest and that 10 lucky winners will win a free custom cookbook? If you haven't submitted your entry, click here to check out the contest.

Monday, October 09, 2006

Keep Your Group Members on Track!

I spoke with a Secret Ingredients member this morning who has been planning her family cookbook for an entire year. Not only has she collected the family photographs, journals, and recipes from past generations, but she has also asked her family members to contribute their favorite recipes and stories as well.

The entire family is very excited about her project. They ask her for updates each time they get together for a meal or outing and are thrilled that they can order their own personal copies. However, she is having a very hard time getting everyone to submit their recipes on time.

When you are working on a family project with a large group of people, it can be very difficult to keep everyone focused! Over the years, I have helped many large families and social groups coordinate cookbook projects, and I would like to share the most effective ways to keep your group on track...

  1. Updates: Send your group updates on your cookbook project regularly. This reminds them about the project and creates excitement. You may consider including a list of the recipes that have been submitted so far. You would be surprised how effective this is. No one wants to feel left out!


  2. Family Newsletters: Include cookbook updates in your family newsletter along with stories and memories that will be documented in your cookbook. Need ideas for family newsletters? Stay tuned to the Secret Ingrediets blog tomorrow for more details.


  3. Plan a Get-Together: Why not plan a recipe potluck to celebrate your cookbook project? Each person can bring his/her favorite dish from the recipes that they will be adding to the cookbook. This is a great way to make your cookbook project more fun, and you get a delicious meal! Read about the Sobel/Pirtle family's Secret Ingredients party that took place in Tucson this summer for ideas.


  4. Procrastinators: If you have group members who are particularly busy or are a little lazy, why not ask if they need help? Teenage children will have fun entering recipes for anyone who needs help.


  5. We have included many features in our website that make group projects very simple. Each group member may log in to the group cookbook project at any time to enter his/her recipes. Every group member will be able to access all the recipes within the project to make sure that their favorites are being added. Furthermore, the group leader ("Head Chef") can leave a note for all the other members, so coordinating is simple.

    There are several benefits to group cookbook projects. Group projects are a great way to unite your extended family in a meaningful project. Together you can celebrate the traditions, stories, and memories that you all treasure. Also, remember the larger the group the less typing you will have to do yourself!

    Set- up a free trial account for your group cookbook project today!

Friday, October 06, 2006

Potato and Green Bean Salad

Today we have another great family recipe for you! Just look how delicious...


POTATO AND GREEN BEAN SALAD

4 cups potatoes (I use a mix of the little red ones and the little yellow ones)
4 cups green beans
¼ cup olive oil
3 tablespoons pressed garlic
2 teaspoons salt

Cut up the potatoes into uniform, bite sized pieces, and boil until soft. Drain them. Cut the green beans into 1 inch pieces, and steam them until done.

Combine the pressed garlic and salt, and let the mixture sit for about 1/2 an hour. It's important to actually let them sit for that long. The salt chemically changes the garlic and makes it about half as spicy, so three tablespoons of garlic doesn't knock you over!

After that time, squish the garlic and salt up with the back of a spoon until pasty. Put the garlic/salt paste into the ¼ cup of olive oil and stir it up. Put the potatoes and green beans in a bowl, and toss with the olive oil mixture. Serve cold.


This recipe is included in the Secret Ingredients' Stock Pot, our special database of recipes that are contributed by people just like you- the real home cooks! Remember that you can add Stock Pot recipes to your cookbook project quickly and easily. If you need extra recipes for your custom cookbook, this is an easy way to find filler. At the click of a button, you can save Stock Pot recipes to your cookbook project, and you can edit them at your leisure. Click here to read more.

If you don't have a Secret Ingredients account, don't worry. Set up a free trial account today to peruse our Stock Pot and website. (No obligations.)

Want to win a free Secret Ingredients heirloom cookbook? It's the perfect wedding gift and holiday gift. Click here to enterPosted by Picasa

Thursday, October 05, 2006

Tips for Storing Your Paper Heirlooms

The Secret Ingredients team was busy yesterday finding the best ways for you to store your family history documents. We found solutions for all your paper heirlooms from family journals to newspaper clippings and photographs...

  • Storage Environment: Don’t store your family history documents and other paper heirlooms in your attic or basement with your off-season clothes and tools! Basements and attics are often too hot, dry or humid. Also, remember to store your heirlooms away from water sources- pipes, plumbing, or areas that could be at risk for flooding.


  • Important Books: Be sure to store books on smooth shelves that are sealed or coated. Unsealed wood can release acidic vapors that will damage your pages.


  • Newspaper Clippings: If possible, laminate newspaper clippings and loose papers. Newspaper becomes very fragile when it is exposed to light and may damage other paper items or photographs if it is not laminated or stored separately.


  • Photographs: Store your photographs in high quality photo albums or in plastic sleeves. You can find inexpensive clear envelopes with an adhesive strip at ClearEnvelopes.com. Do not store photographs in acidic paper envelopes or with rubber bands, paper clips, or poor quality adhesives. Keep your photographs away from any products that contain sulfur dioxide, cardboard, plywood, or fumes from paint or cleaning supplies.


  • Archival Boxes: Store your paper heirlooms in high quality, archival boxes. This website, ArchivalMethods.com, has many options in all price ranges. Also, check The Container Store for affordable options for all document types.


  • Make copies: Make several photocopies of articles with photographs and graphics. Type a back-up copy of journals, articles, and handwritten notes. Remember that ink may fade over the years, and handwriting can be difficult for future generations to interpret.


  • If you are interested in documenting and storing your family recipes, stories, and photographs, check out Secret Ingredients heirloom cookbooks. Set-up your free trial account today!


 Posted by Picasa

Wednesday, October 04, 2006

News (Old and New!) at Secret Ingredients

Guess what? Secret Ingredients will be launching a new product line very soon. How exciting! Our new line of custom cookbooks will help you create recipe scrapbooks for all occasions. Short on time or cash? No worries- our new cookbooks are elegant, affordable, and you may enter as many or as few recipes as you would like!

Stay tuned to learn more about our new treasures. We hope to launch the new product line at the beginning of November- just in time for Christmas gifts. Our new books even come in a holiday theme- perfect for giving friends and neighbors during the Holidays.

This week I am putting the finishing touches on the new cookbooks. My mother is so excited about our new Holiday books that I am using her favorite recipes to create the samples for our website. Each year, my mother makes miniature rum cakes, Friendship Soup mix, homemade oyster crackers, and peach preserves for her friends and neighbors. This year she is so excited to include a Holiday collection of her favorite recipes!

Last week she gave me the family cookbook her grandmother made for my mother's wedding gift, so that I can add these recipes to her holiday cookbooks.


Reading the recipes from my mother's handwritten family cookbook was quite a chore. Not only is my great-grandmother's handwriting difficult to read, but the pages are starting to age and the ink is fading.


I even enhanced the picture below with graphic filters to make it easier and clearer for you to see!


Lately we have received a lot of phone calls from customers who want to include scans from old family journals, cookbooks, and news clippings in their Secret Ingredients cookbooks. Including these items in a family cookbook is ideal, because it is difficult to protect, preserve, and share these documents with your family members and future generations.

Because of my own experience with my family's handwritten heirloom cookbook and because there has been a lot of talk about preserving older documents and photographs with our customers, I've decided to devote special attention to storing and sharing heirloom documents and photographs on the blog this week.

Stay tuned tomorrow for tips on storing your family cookbook, journals, and other paper items... Posted by Picasa

Monday, October 02, 2006

Recipe Gifts: Make Your Own Baking & Soup Mixes

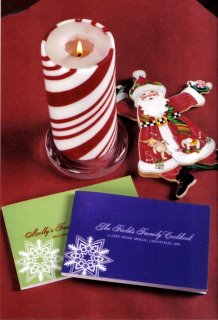
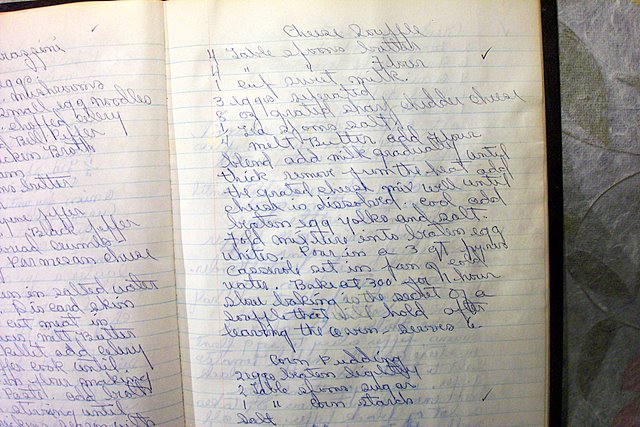
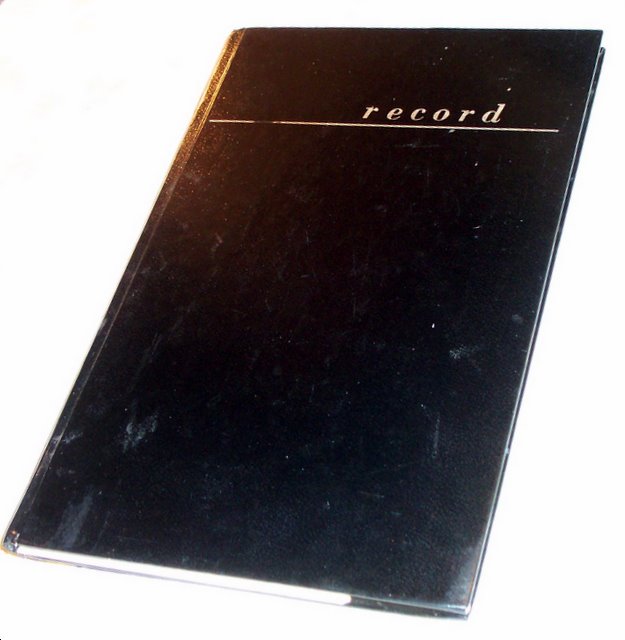
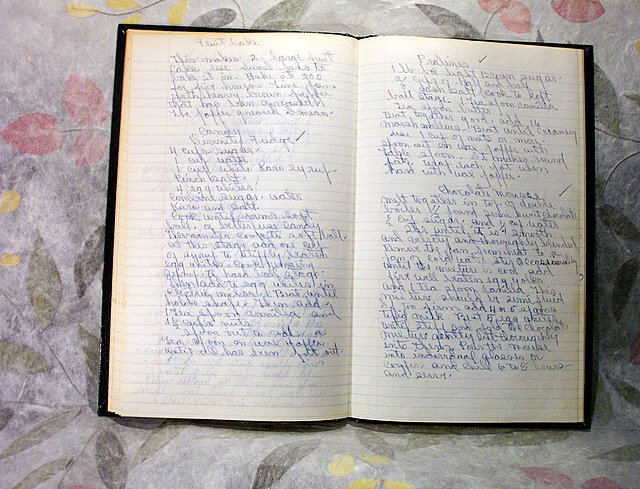
In today's world, where families are spread across the globe and family dinners are becoming more of a special occasion than a daily occurrence, it's important to share and cultivate family traditions, recipes, and stories. Recording favorite recipes into a Custom Heirloom Cookbook is one way to ensure that those precious memories and flavors stay with your family through the years and generations. An Heirloom Cookbook is also a great way to share your recipes and traditions with friends, family, and loved ones.

Another wonderful way to encourage your friends and loved ones to try some of your favorite recipes is to make it so easy for them that they can't say no! Making your own baking mixes and soup mixes is a simple way to give your friends and family a few new flavors to add to their meals.

The most important part of making your own baking mix is choosing the right recipes. You want to choose a recipe whose ingredients are primarily either dry or wet. Recipes with things like canned fruit, jam, canned tomatoes, meats, and other ingredients that your friends and family might not keep at hand, and that are impossible to pack and ship, are recipes to be avoided.

Baking Mixes:

Baking mixes are simple and fun to assemble, not to mention pretty!
Choose a container that you know will fit all the ingredients you need to use. I love using beautiful, antique canning jars.

Once you've chosen your container, look at your recipe. Write down all the dry ingredients in one list, and all the wet ingredients in a separate list. Ideally you should have just a few wet ingredients; eggs, milk, butter, vanilla, etc.

Using your list of dry ingredients, carefully measure and pour those ingredients into your container in layers, patting each layer smooth with your fingers. Once you're finished, cap the container, and your mix is done!

Be sure to include instructions for use that tell the recipient what they need to add to the dry ingredients (all the wet ingredients), how to prepare the mix, what to bake it in, at what temperature and how long. Decorate your container with a lovely satin ribbon, or a square of cloth screwed into the lid, and give a gift that will warm someone's heart and kitchen!

Soup Mixes:

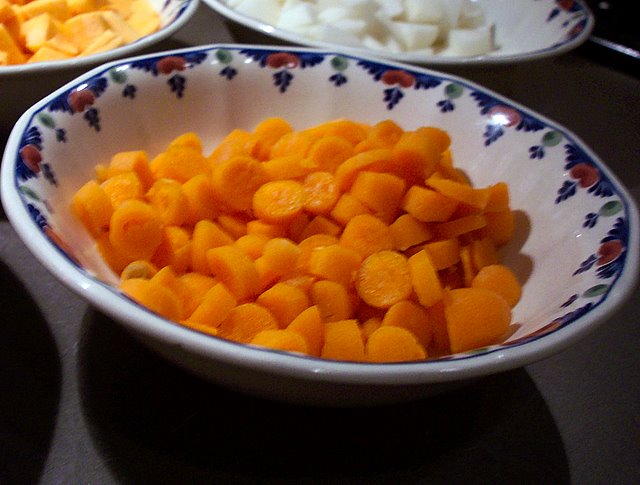
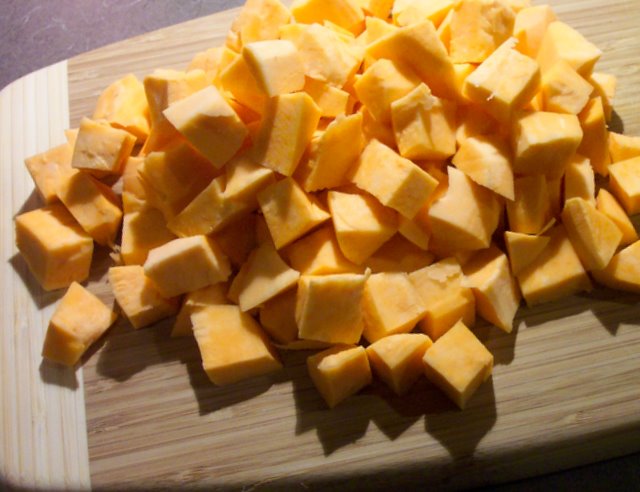
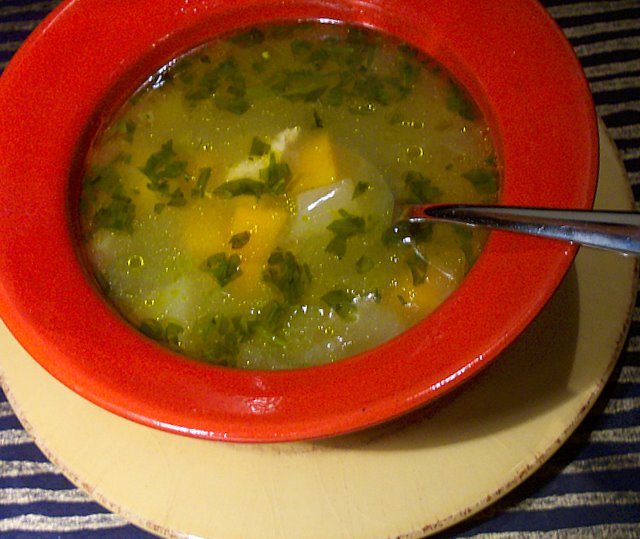
Soup mixes are a wonderful seasonal gift, and especially good as we enter the colder months. To make a soup mix, first choose your recipe. You want to choose a recipe without a lot of prep work (for example, a meatball soup like Italian Wedding Soup would not work well), and with a lot of dried ingredients. Bean soups and stews and soups with pasta work great.

Choose a container or bag, and begin pouring in the dry ingredients in layers. Be sure to pour the fine ingredients, like herbs or cornmeal, first, and the big ingredients, like beans or pasta, last.
This way, the layers will stay crisp; if you reverse the order, the fine ingredients sift down through the spaces in between the larger ingredients, and your layers get jumbled.

Again, be sure to include all the instructions the chef would need to complete the recipe, and finish your packaging with a pretty detail.

Making mixes is also a perfect way to create economical, personal wedding favors! Make a mix that is relevant to the location of the marriage, or make a mix of the groom's favorite food! Wedding guests will be surprised and pleased to be given a favor full of the flavors of the area!

Secret Ingredients is currently offering free trial accounts. Set yours up today and explore the recipes in our Stock Pot! Some of them are perfect for baking and soup mixes, and your account is free.